Provisioning Application
Provision applications on any cluster and namespace
Provision application on any Kubernetes Cluster
Once you have added your applications, the application can be provisioned by any user on your organization, on any cluster that is added to your organizations dashboard.
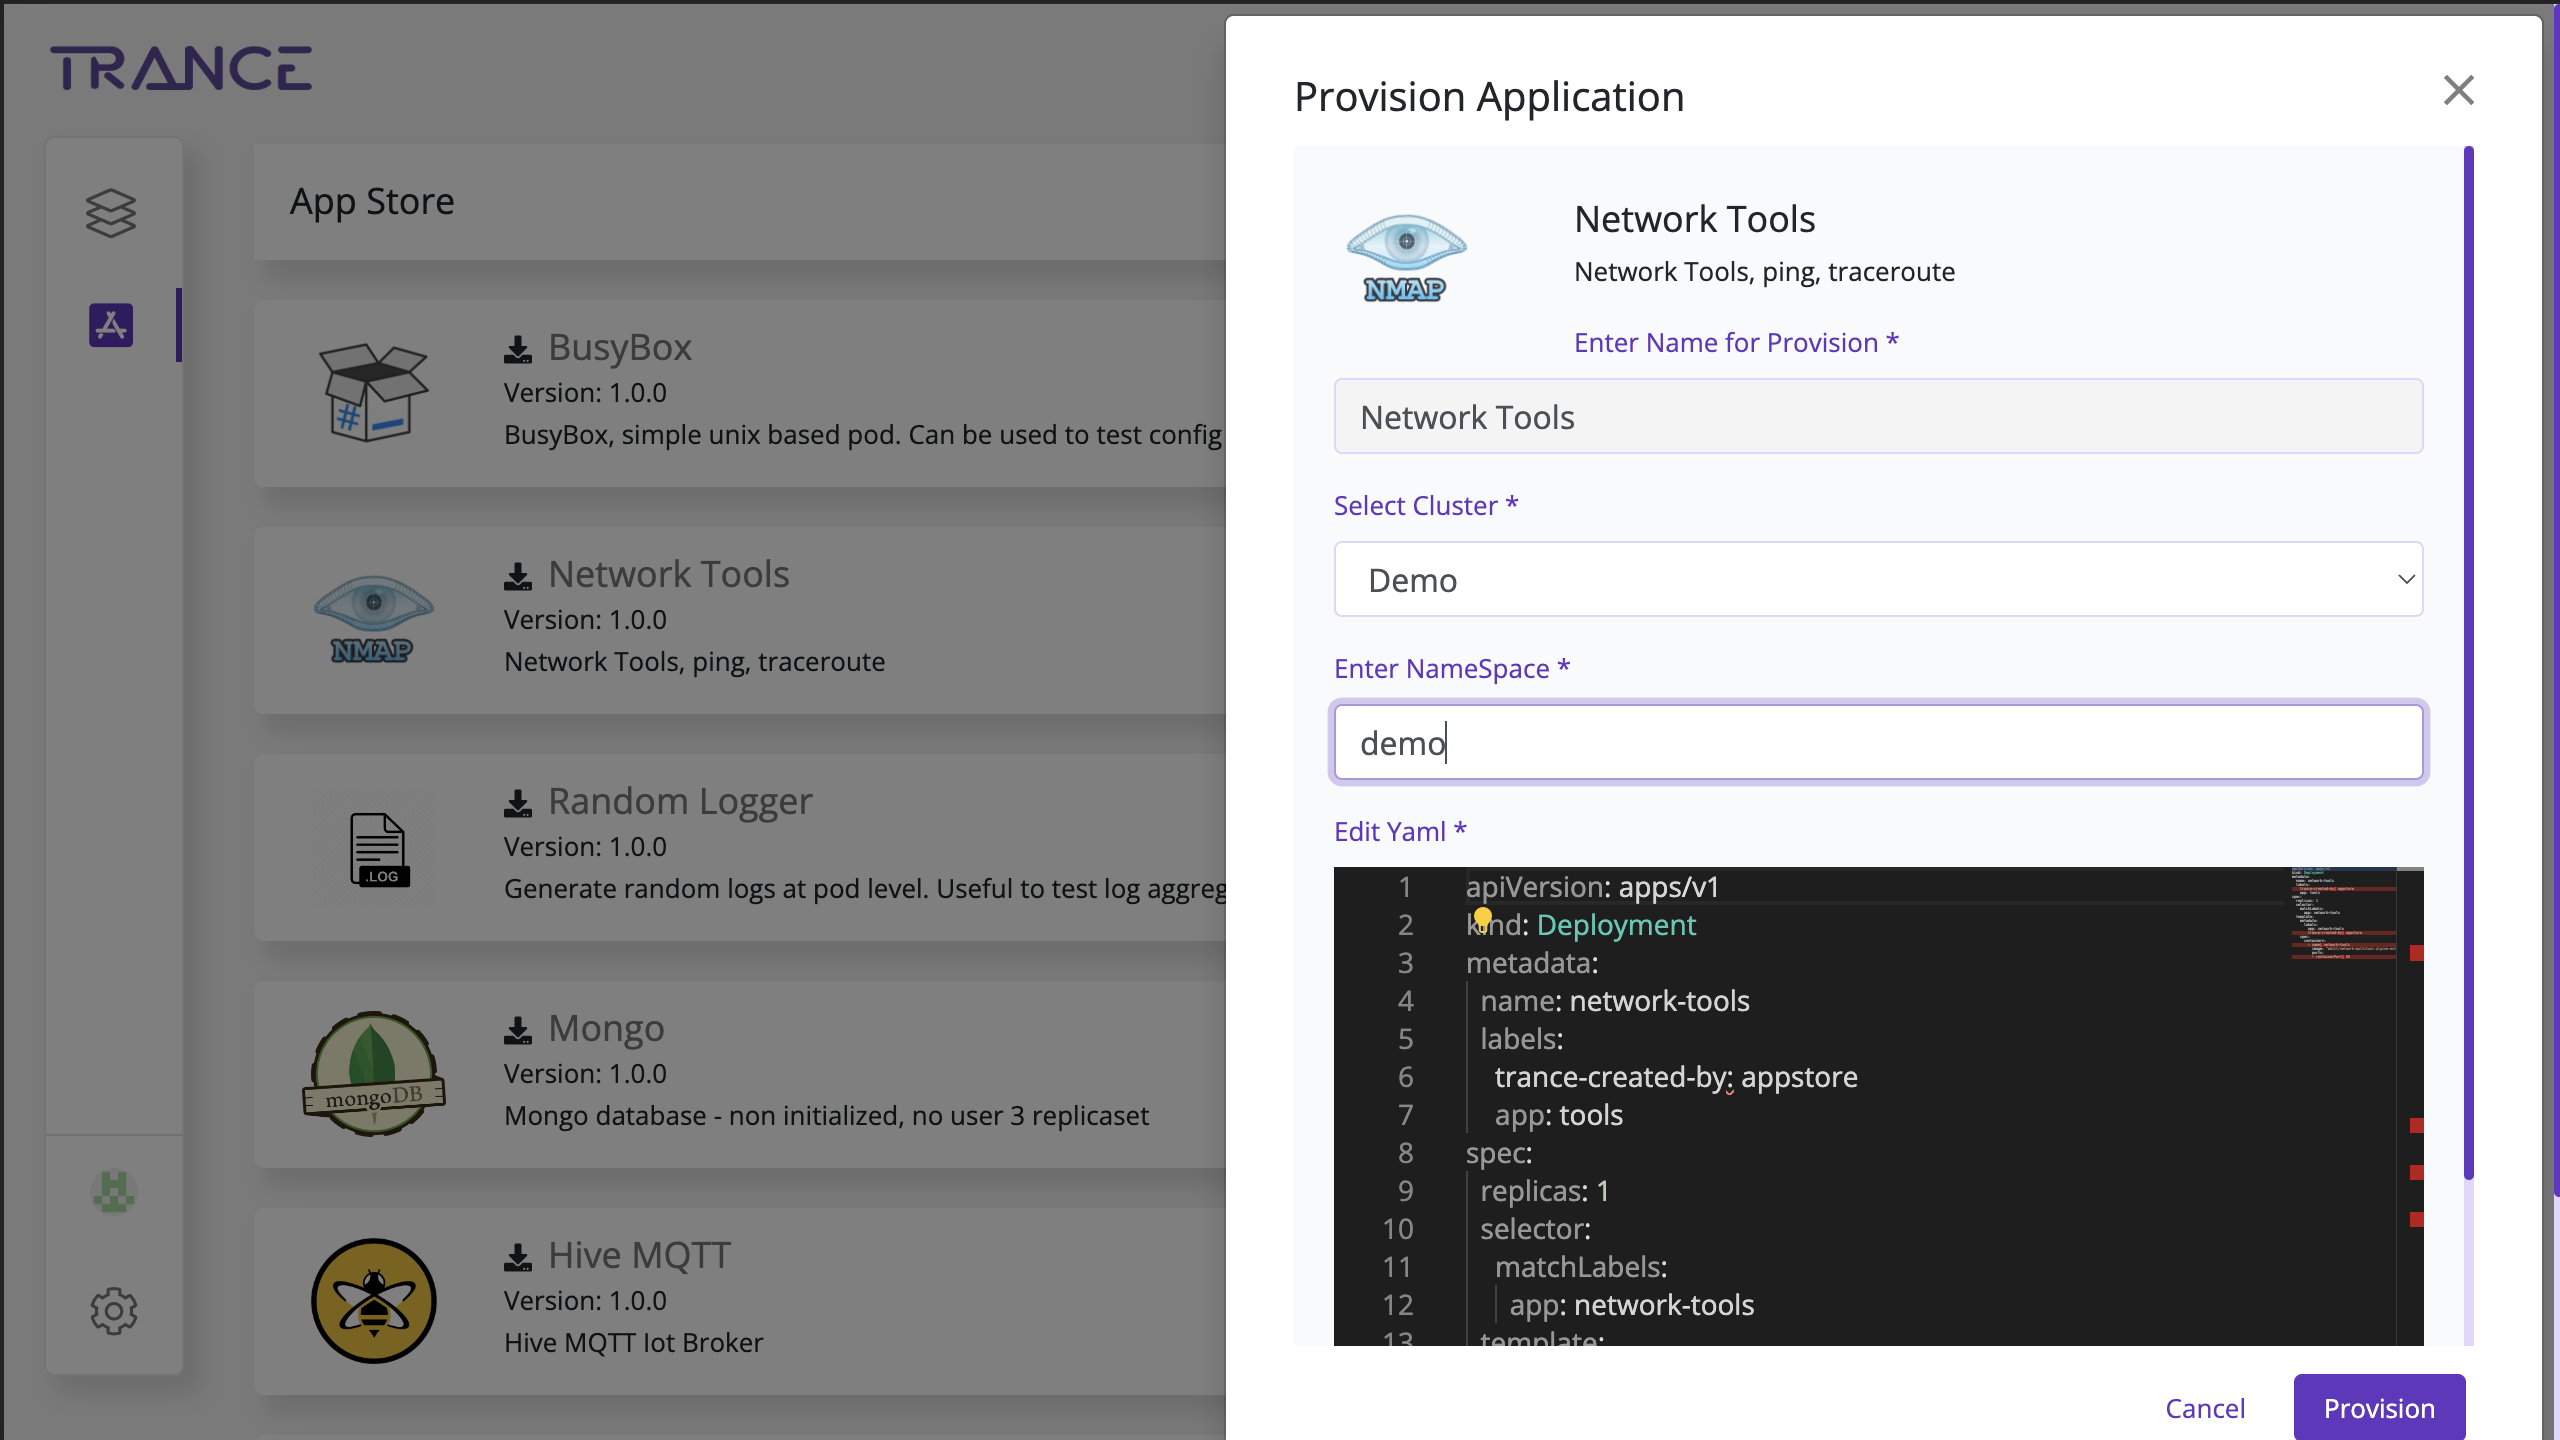
- Search and click on the Application that you want to provision
- You will be prompted with a form
- Select the cluster, on which you want the application to be provisioned
- Trance will fetch the namespaces, on which you are permissions on the cluster
- Select the name space and click on the “Provision” button on the bottom right of the form
Status of provisioning application on any Kubernetes Cluster
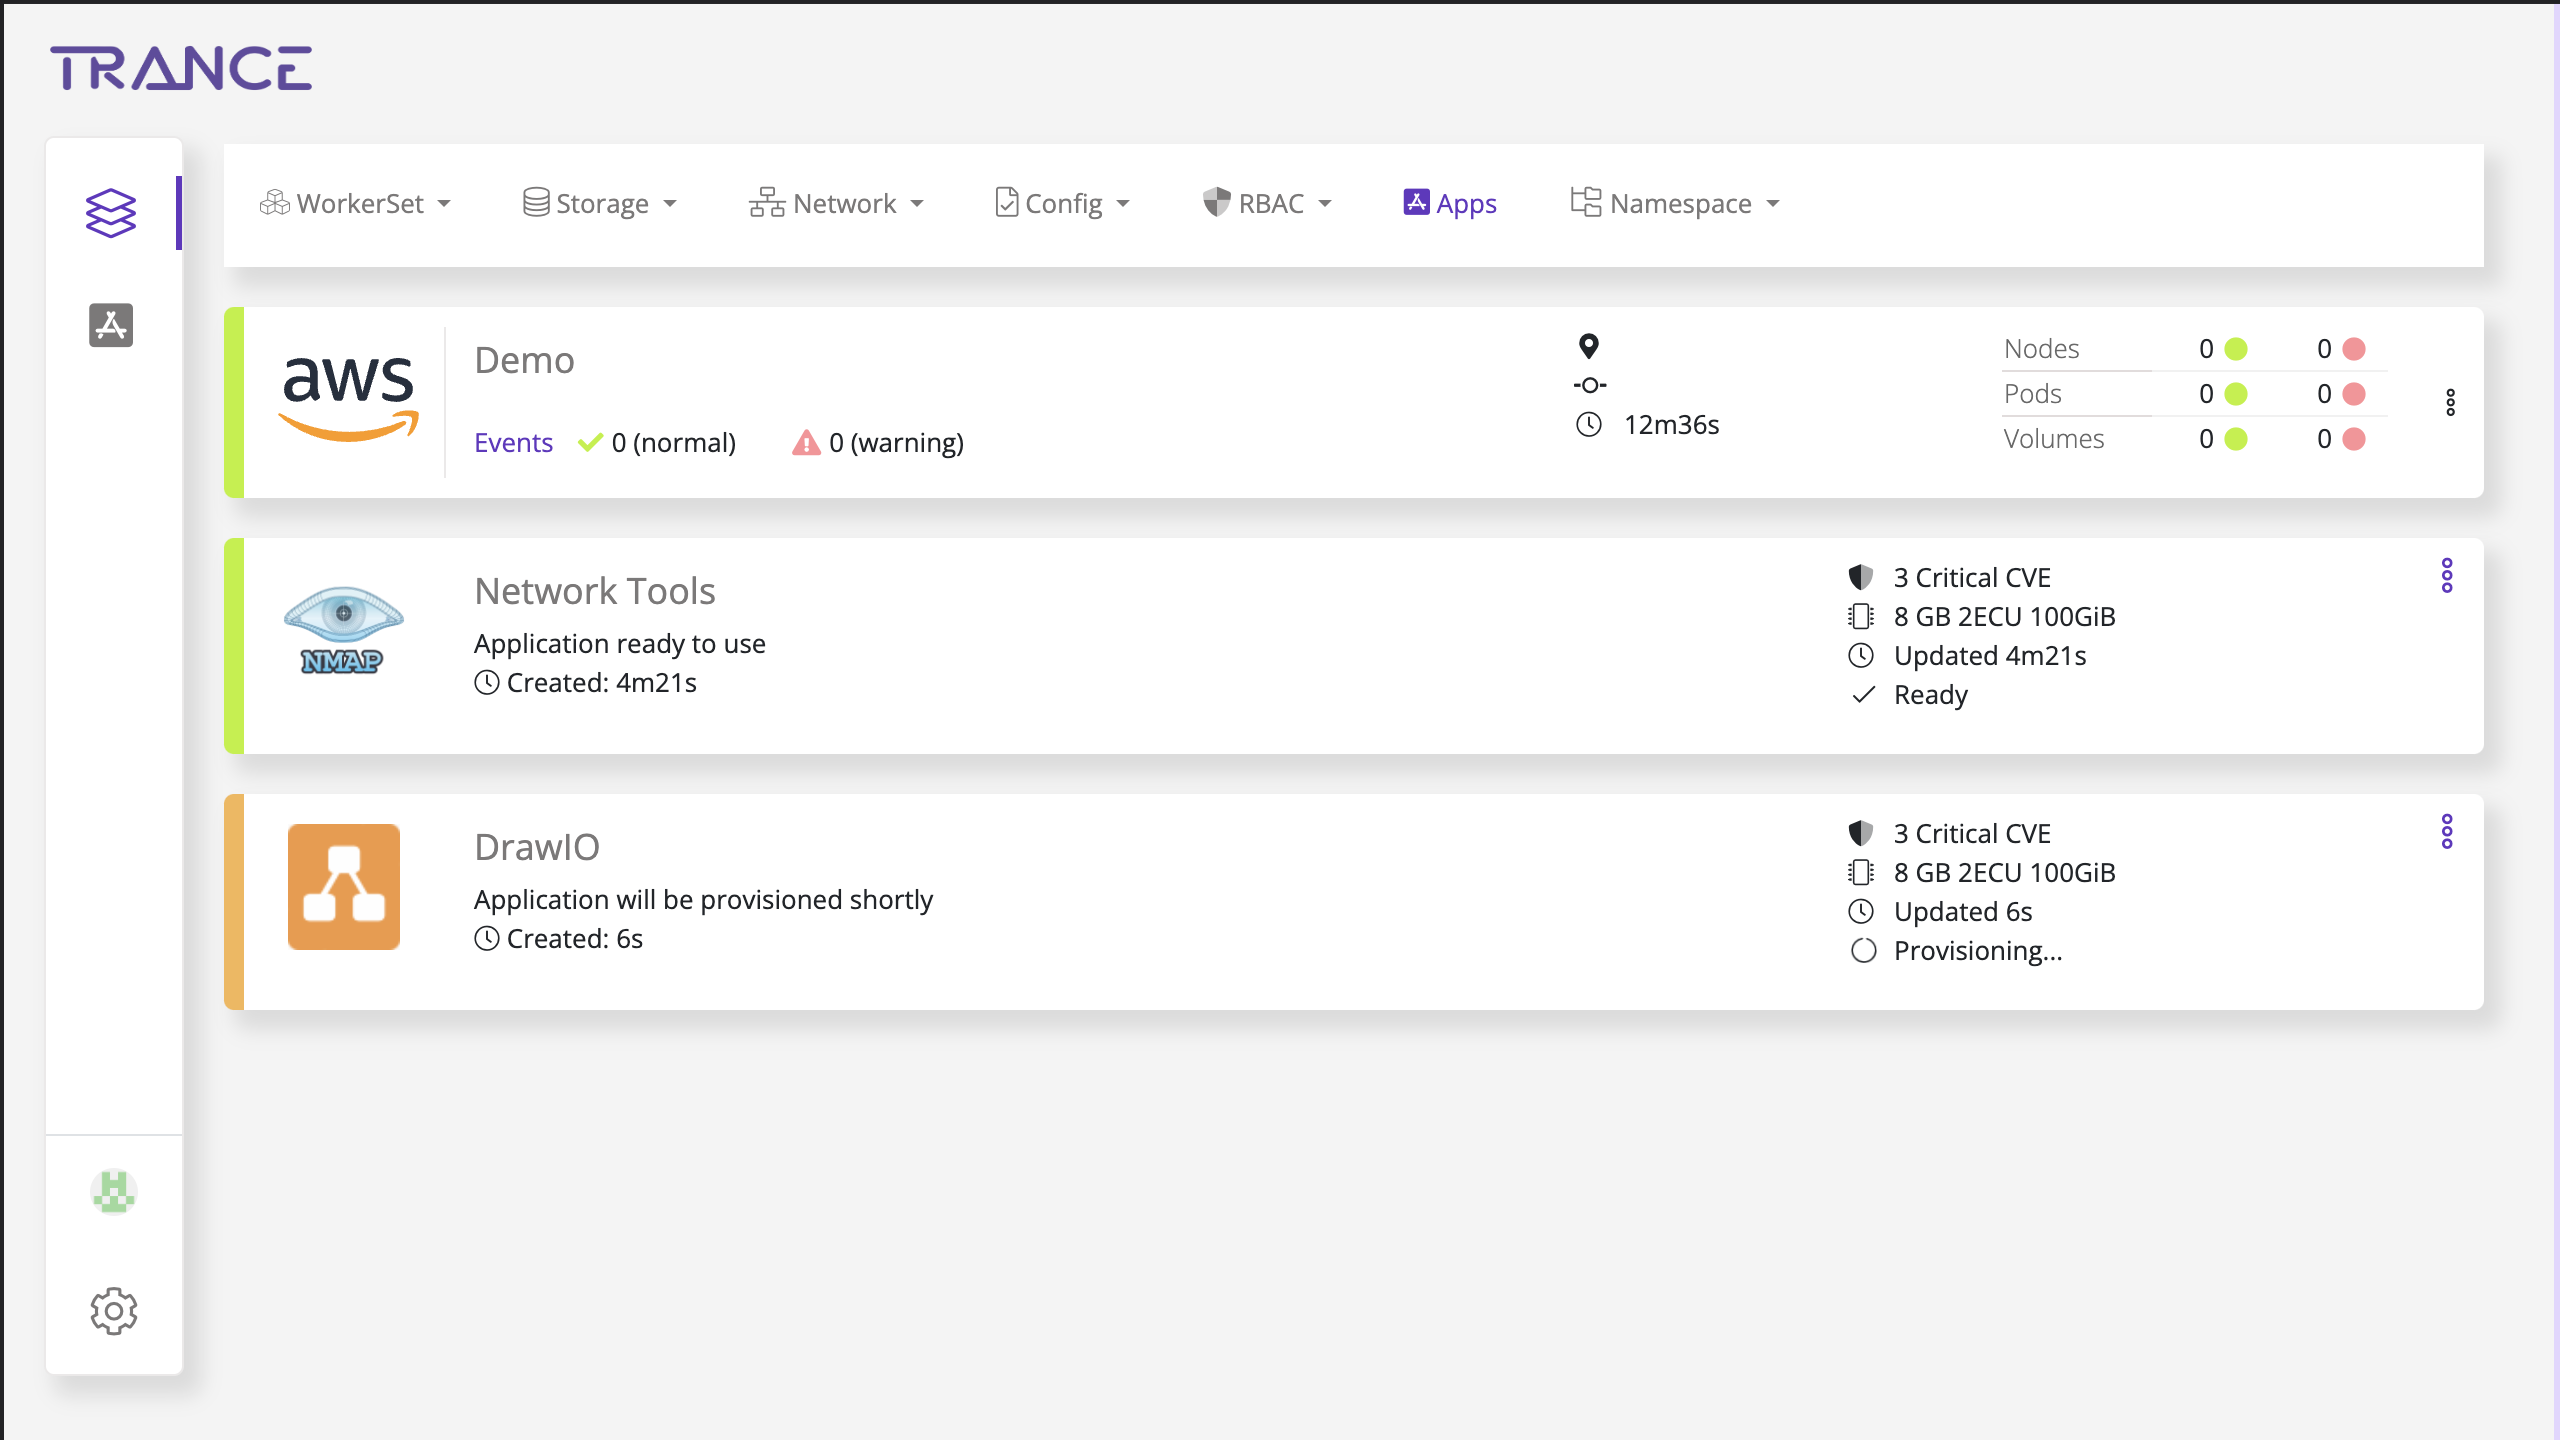
Once the provision button is clicked, the view changes to the App page/tab on the cluster detailed view. The application will be in Orange color, till the provisioning is complete. Any errors will be shown in the Apps screen.

Status of provisioned application on any Kubernetes Cluster
Once the provisioning is complete, the application status color changes to green, as indicated above.
Application provisioning can take anywhere between a minute to an hour, depending on the complexity of the application, and the associated jobs.
App provisioning exposes a service as indicated in the application yaml, but it does not open firewall and application firewall ports. This might have to be done manually. And the operations might differe on your platform of choice.
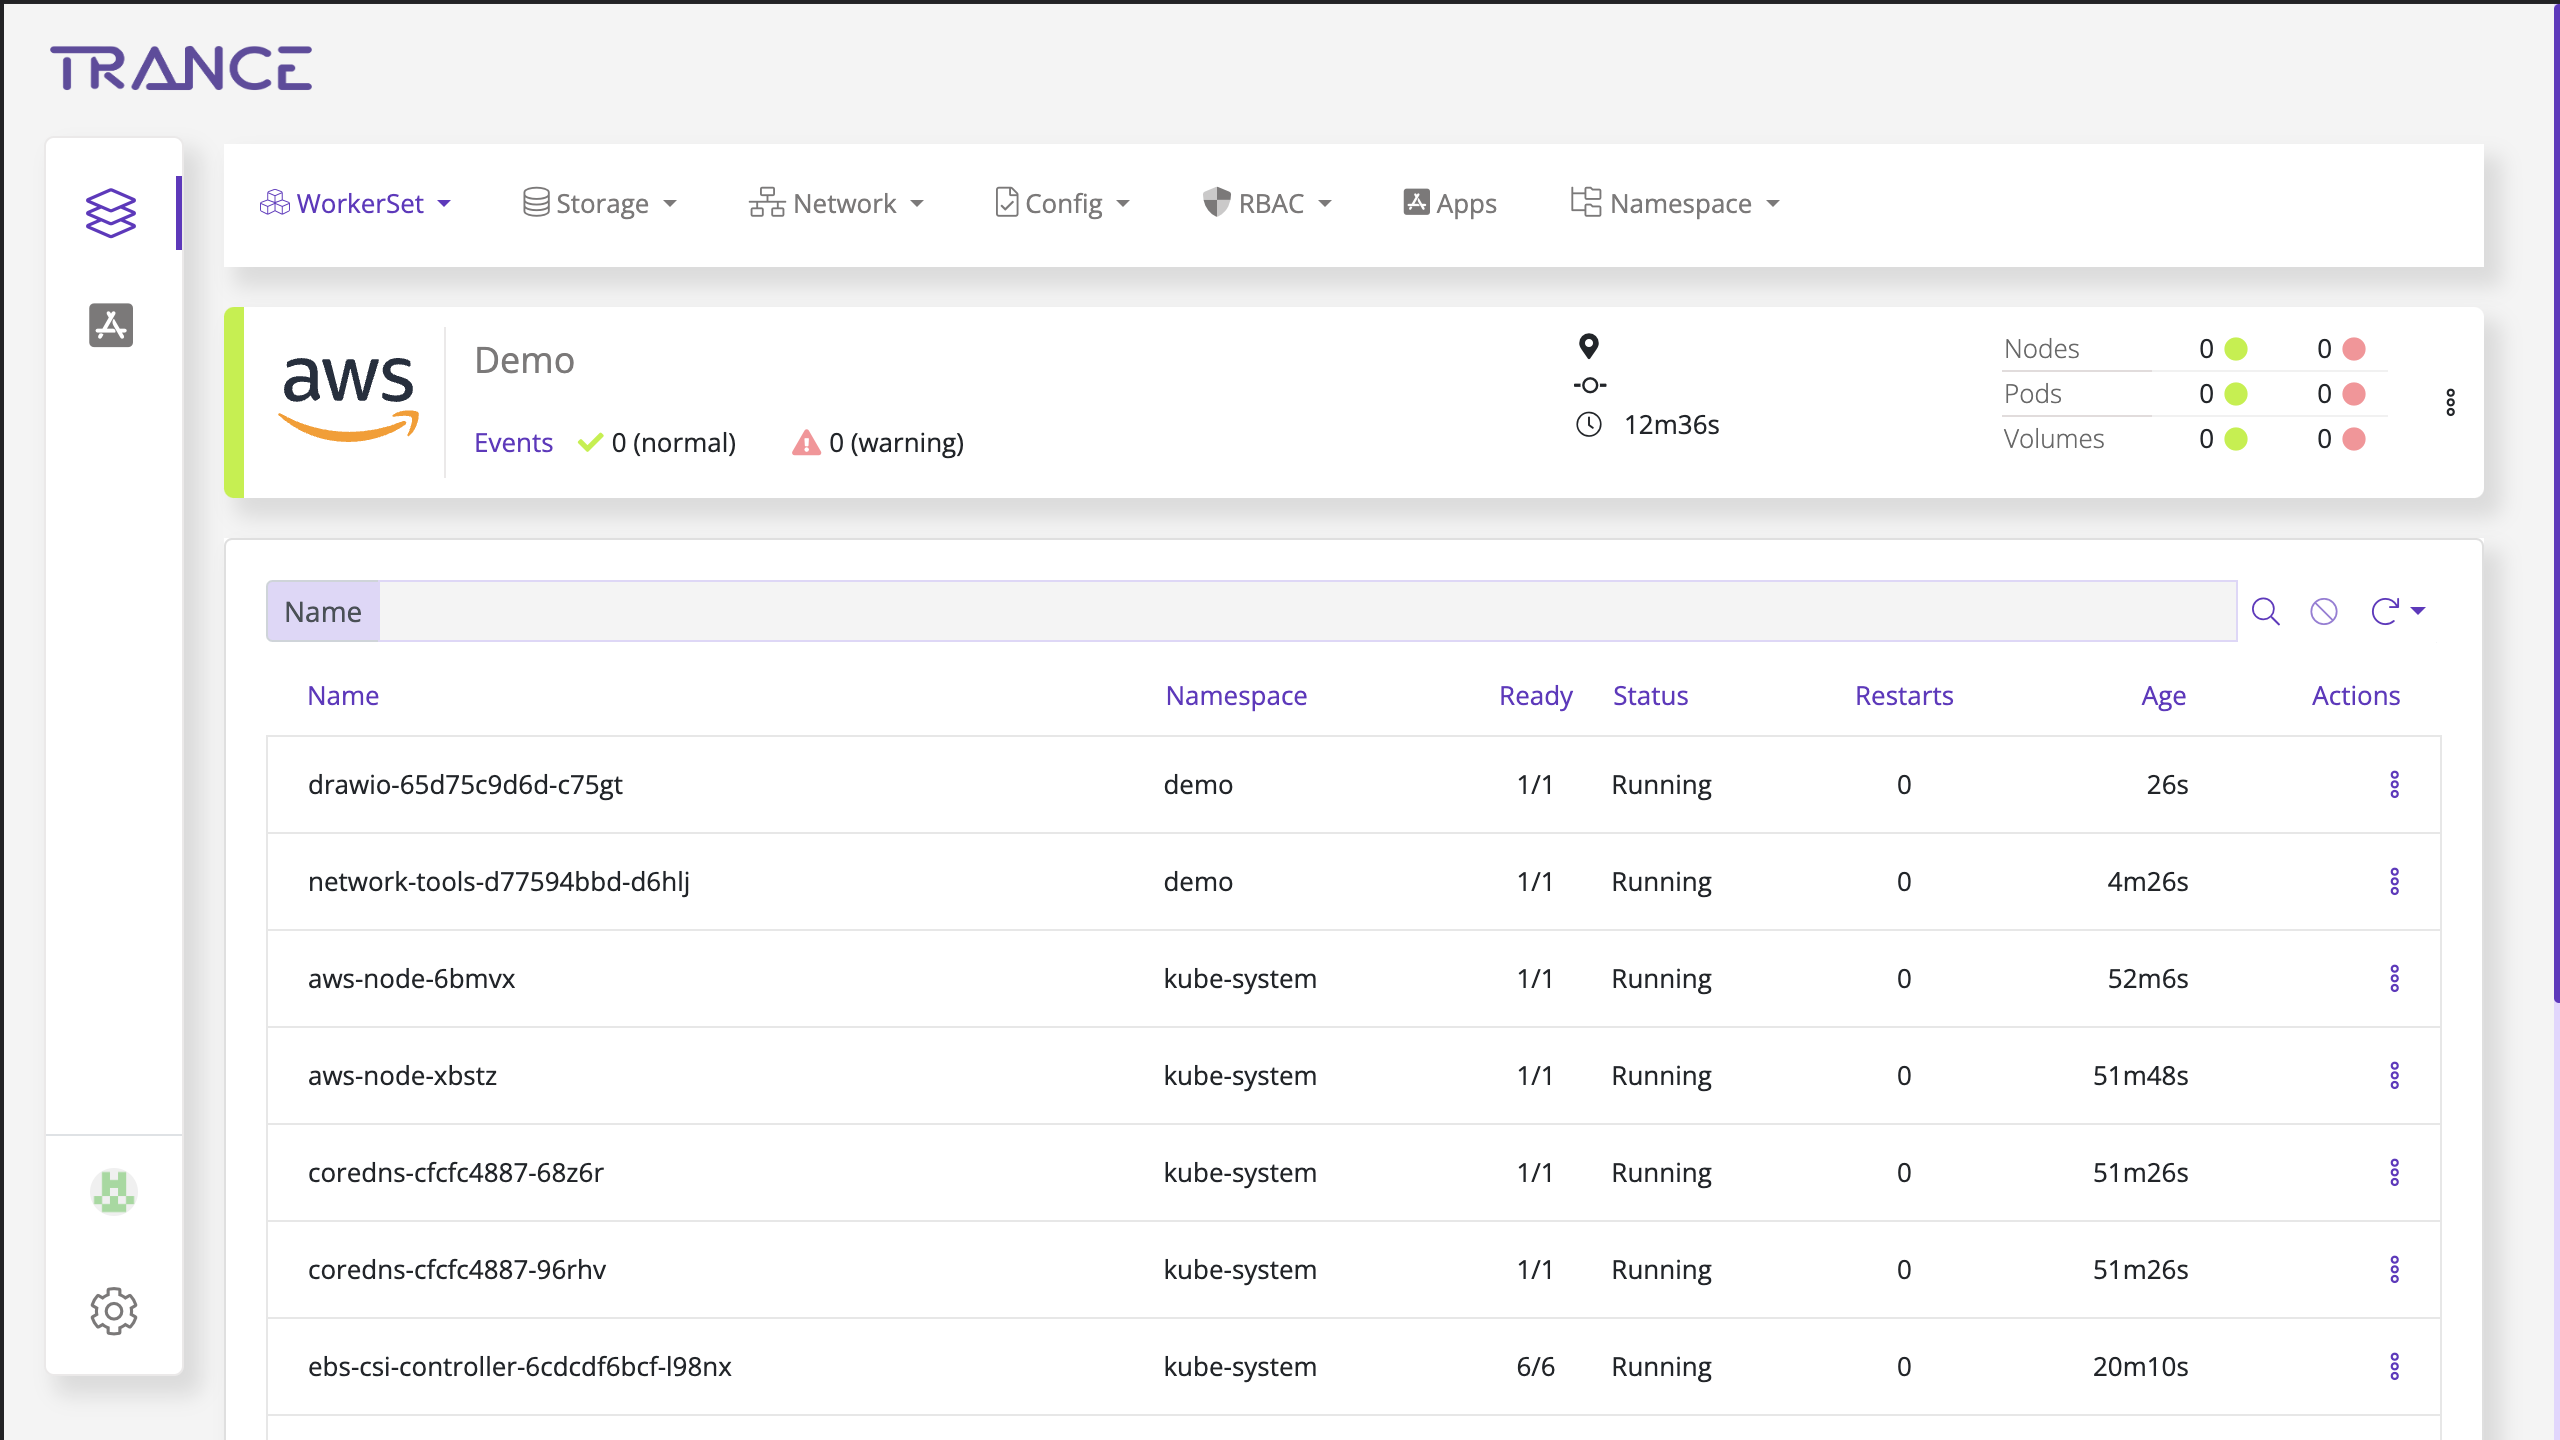
Status of pods provisioned by application provisioning
On the pod management page, the status of the pods created by application provisioning can be tracked.
All the existing functionality of tracking logs, getting terminal access, restarting pods etc can be done on the new pods.